Hands-on Lessons
The materials needed for these lessons are basic supplies that most people have at home. They’re a fun and educational way for students to learn with family members. Follow up with your students to make sure they enjoyed and learned from these activities.
Lesson 1:
Lesson 3: How Natural Gas Is Found
Introduction
Natural gas is located within the Earth. To find natural gas, geologists send shock waves downward through the surface of the planet. Once the waves have been sent, the scientists measure how long it takes the waves to bounce back. When a gas deposit is located, a derrick is constructed to support the equipment needed for accessing the natural gas. After the gas is removed from the Earth it goes to a processing plant and then to a regulator station to control the amount of gas that is pumped to our homes. At the regulator station the chemical mercaptan is added to help people detect natural gas leaks. Use this activity to show how natural gas is trapped below the Earth and the tremendous pressure on the gas deposits.
Objective
Students will learn how geologists locate and transport natural gas.
Purpose of Activity
Review, Identify Details, Read or Listen
21st Century Skills
Critical Thinking
Cognitive Level
Skills and Concepts
Class Time
15-30 minutes
Materials (for each group)
- Aquarium or another large clear container
- Balloon
Procedure
Fill an aquarium half full of water. Blow up a balloon and hold the opening closed as you submerge the balloon in water. Discuss what would happen if you drilled a hole to where the natural gas was trapped. Let air out of the balloon underwater.
How do you think gas is located and obtained from below the surface of the Earth?
- By using sound waves and drills
What pipes or wires can be found underground?
- Electric lines, natural gas lines, water lines
Lesson 2:
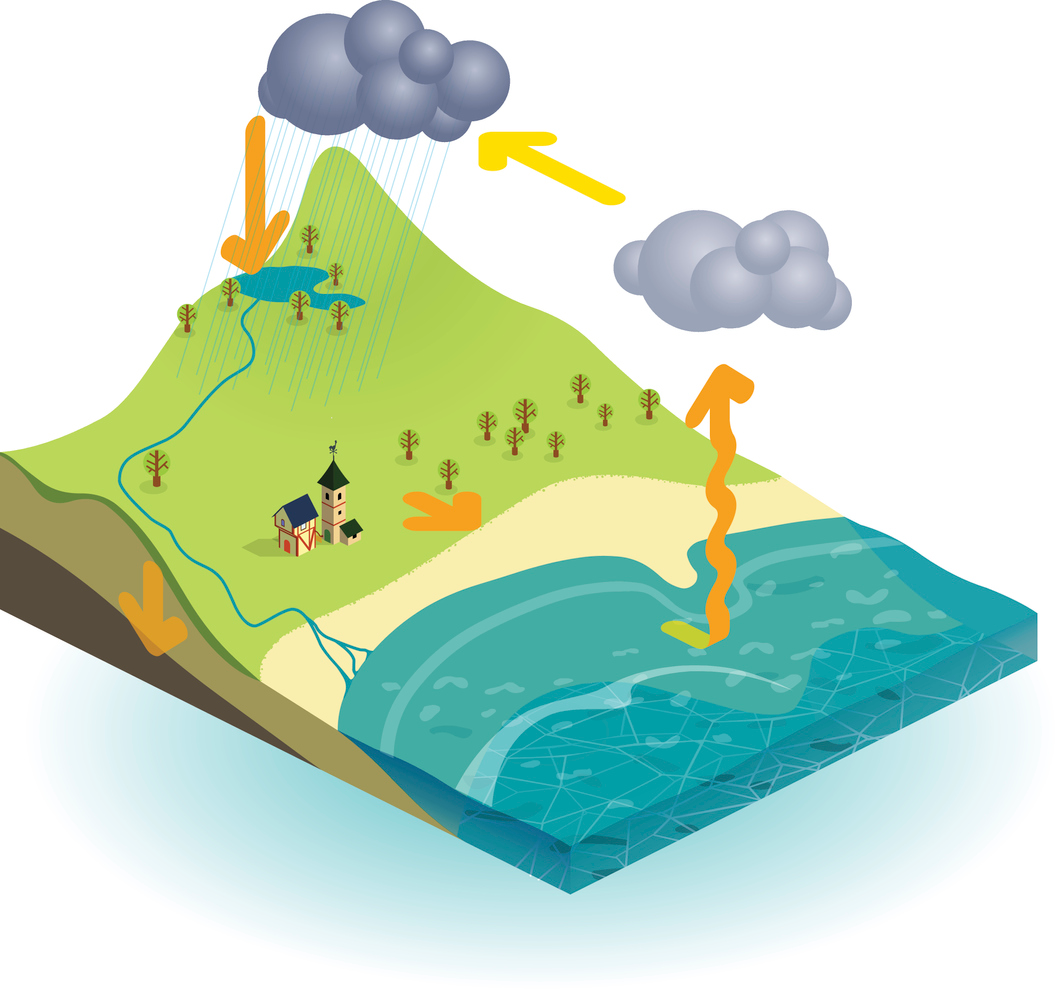
Lesson 1: The Water Cycle

Objective
Make a miniature environment to see the water cycle at work.
Purpose of Activity
Apply Skills, Create
21st Century Skills
Critical Thinking
Cognitive Level
Strategic and Extended Thinking
Class Time
45 minutes over three days
Materials
- Soil
- Water
- Small plastic bowl
- Large, clear plastic container or an old aquarium
- Plastic wrap
- Plastic trees, animals, boat, etc. (optional)
- Tape or large rubber band
- Bag of ice (optional)
- Heat lamp (optional)
Procedure
- Arrange the soil in the container to make mountains, plateaus, hills and a lake basin. Place the small plastic bowl in the lake basin. Fill the bowl with water. Add any plastic animals, trees or boats to the environment. Cover the container tightly with plastic wrap and secure it by means of tape or the band. Place the container near a sunny window.
- Discuss what is expected to happen in the container.
- Depending on the amount of sun, the project may take one to three days. In order to speed up the process, a bag of ice may be placed on one end of the covered container, while a heat lamp is focused on the other.
- Watch for condensation on the plastic wrap “sky” of the container. When enough moisture collects, it will fall onto the landforms as precipitation.
Where is water collecting?
- It is collecting on the inside of the plastic wrap cover.
Why is it collecting there?
- The water is evaporating and that is what is causing it to condense there.
What happens to the water after it evaporates?
- It precipitates back down into the aquarium.
Lesson 3:
A Product’s Life
Objective
To teach students the concept of product life cycles, including the various steps and related environmental issues involved.
Purpose of Activity
Review, Identify Details, Read or Listen, Create
21st Century Skills
Critical Thinking and Creativity
Cognitive Level
Strategic and Extended Thinking
Class Time
45 minutes over two days
Materials
- Index cards
- Library, computer/Internet access
- Scissors
- Markers
- Heavy-duty (cardstock) paper
Procedure
Day 1:
- Introduce the concept of product life cycles. Start by giving a general overview of life cycles, and relate this concept to something familiar to the students (e.g., our own lives, the life cycle of a tree). Continue by explaining that all products are made of something that ultimately comes from nature and that all products end up somewhere after we are finished using them.
- Move on to more in-depth discussions of the various steps of a product’s life cycle. Be sure to define each step: raw materials acquisition/extraction, materials processing, manufacturing, product packaging, distribution, use (lifespan) and end use (reuse, recycling, disposal). Discuss how each of these steps can have environmental consequences.
- Investigate the life cycle of an everyday item. Have the class select one or two products whose life cycles they would like to research. Choose a common product, such as one used often in class or at home (for example: calculator, radio, remote control, lightbulb, pencil sharpener, computer keyboard or mouse).
- Divide the class into research teams for each item chosen. As a homework assignment or an in-class activity, have students work in groups of three or four individuals to research an individual step of the chosen product’s life cycle. Students can use the library, Internet and other resources.
Day 2:
- Direct the students to use their findings to organize a short presentation to the class. Give each group a handful of index cards on which they can write down notes. Have each group give an oral presentation to the entire class on what they discovered through their research. Be sure to only discuss one product’s life cycle at a time and have the groups present in the proper order of the steps of a life cycle (i.e., materials extraction, then processing, then manufacturing, etc.). Encourage the students to be creative, including using props or other visual means of presenting their information.
Does knowing more about a product’s life cycle affect your decision to buy the product?
- Answers will vary but should include discussion on alternatives to buying (reusing, delaying purchase, etc.)
Source: https://www.epa.gov/sites/production/files/2015-09/documents/qfl_complete.pdf
Expanded Information
These materials provide even more insight into the science, usage and importance of these materials. Click below to find more educational resources that align with your educational standards and fit into your curriculum.
Expanded Information 1:
Water Fun Facts
Ninety-seven percent of the Earth’s water is salt water in the ocean. Two percent is stored as fresh water in glaciers. This leaves only 1% of all the water on Earth as water for people to use. If all the world’s water were put into a gallon jug, the fresh water available for us to use would equal only about one tablespoon.
How Much Water Are You?
Students will calculate how many 8-ounce glasses of water they are made of.
- Have students write down their weight.
- Divide their weight by three.
- Multiply the new number by four.
That’s about how many 8-ounce glasses of water it would take to equal all the water in a person.
By the time a person feels thirsty, his or her body has lost over 1% of their total water amount. Drink water before you get thirsty.
Facts:
- Each day the sun evaporates one trillion tons of water off of lakes, rivers and oceans.
- Over 42,000 gallons of water are needed to grow and prepare the food for a typical Thanksgiving dinner for eight.
- In 1969, the Cuyahoga River near Cleveland, OH was so polluted that it caught on fire.
- There is exactly the same amount of water on Earth now as there was in prehistoric times.
- Water is the only substance on Earth naturally found in the three true element forms: solid, liquid and gas.
- Water expands by 9% when it freezes. Ice is lighter than water, which is why ice floats on water.
Expanded Information 2:
Where Does My Water Come From?
Large groundwater basins lie beneath Los Angeles County and have served as natural reservoirs for storing water underground for millions of years. The Central Basin is one of these groundwater basins located underneath the City of Long Beach.
Long Beach has water rights to pump approximately 30,000 acre-feet of groundwater per year out of Central Basin. This amount of groundwater is pumped using groundwater wells located throughout the city and is enough to fulfill around 60% of Long Beach’s water needs.
The rest of the water supply in Long Beach (about 40%) comes from imported sources originating hundreds of miles away. The two main imported water sources are the Colorado River watershed and the Sacramento-San Joaquin Bay Delta. That water is imported into the region by the Metropolitan Water District of Southern California (MWD), one of the world’s largest water agencies and the region’s water wholesaler from which Long Beach purchases its imported water supplies.
Source: https://lbwater.org/water-sources/ground-and-imported-water/
Expanded Information 3:
Recycling

How much trash?
Did you know that the average Long Beach resident throws away 4.5 pounds of trash each day? That’s 1,642 pounds of trash per year from every man, woman and child in our city! Long Beach Recycles is a program within the Public Works Environmental Services Bureau (ESB) that strives to cut down on waste by helping residents, visitors, schools and businesses reduce, reuse and recycle. They also provide free and easy ways to properly dispose of special waste items that can’t go in the trash, such as household hazardous waste (HHW), electronics and more.
What can be recycled?
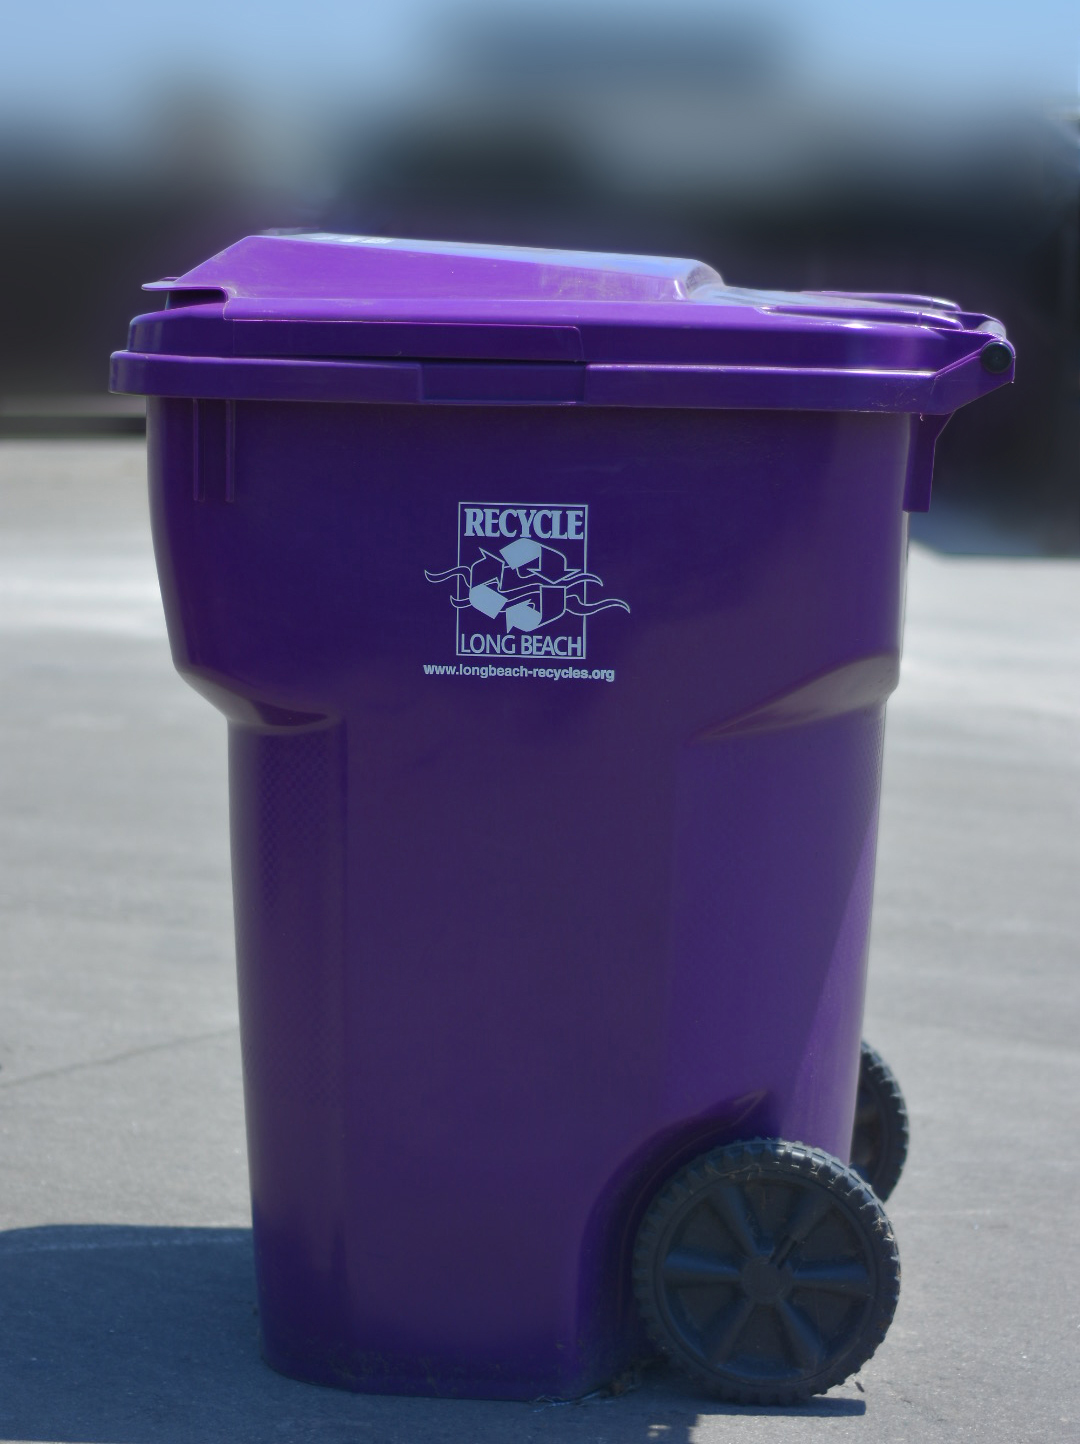
Place these items in your purple recycling cart:
Aluminum, steel and tin cans
Includes cans for soda, soup, beer, beans, fruit or vegetables or any other can that is made of aluminum, steel or tin. Please rinse and place lid inside before recycling.
Beverage containers
Includes bottles for water, milk, soft drinks, wine, beer or any other bottle made of plastic or glass. Please rinse and place caps back on containers before recycling.
Cardboard
Includes boxes used for moving and shipping or any other box made of cardboard or boxboard. Please flatten boxes before recycling.
Empty paint and aerosol cans
Be sure these cans are empty and dry.
Glass jars
Includes jars for jams or jelly, spaghetti sauce, olive oil, pickles, preserves or any other jars made of glass. Please rinse and place lids back on containers before recycling.
Cartons
Includes paper cartons for milk, soy milk, creamer, juice, wine, soup, broth, egg substitutes and juice boxes. Please remove straws. Please rinse and place caps back on containers before recycling.
Mixed paper
Includes paper used for junk mail, catalogs, cereal boxes, tissue boxes, milk cartons, telephone books, magazines, newspapers or paper used for computer printing.
Plastic containers (#1 through #7)
Includes containers for peanut butter, mayonnaise, yogurt, margarine, shampoo or any other plastic container marked with the #1, 2, 3, 4, 5, 6 or 7 on the bottom. Please rinse and place lids and caps back on containers before recycling.
Expanded Information 4:
Why Compost?

Green waste and food waste account for approximately 30% of the refuse generated by the average household. Instead of ending up in the trash, green waste can easily be converted into a valuable soil amendment for your garden, resulting in more productive vegetables or flowers for your enjoyment. This conversion is known as “composting” — recycling your green waste and food waste.
Composting occurs in nature as vegetation falls to the ground and slowly decays. This process provides minerals and nutrients needed by plants. Setting up a composting system in your backyard or at your school speeds up this natural process. Organic materials like fruits, vegetables and yard waste are collected and then decomposed with the help of oxygen, water and microorganisms.
The resulting material is called “finished compost” or “humus,” an important component of healthy soil. Humus that results from composting adds nutrients to the soil that can increase the health of your plants and help save money ordinarily spent on fertilizers.
Vermicomposting is simply using worms to compost food scraps. The best kind of worms to use is Eisenia Fetida (a.k.a “red wigglers”). These worms are incredible garbage eaters! They eat their own weight every day, so even a small bin of red worms will produce several pounds of all natural, chemical-free fertilizer to mix into potting soil or garden mulch. These worms can be easily obtained by ordering from local suppliers such as McCrawls, online from private companies by viewing here, or searching the term “red wiggler vermicompost.”
Did you know your school can start composting? It can! The City of Long Beach Environmental Services Bureau offer in-class presentations and up to one composting bin per school. Schools can request this by emailing:
[email protected]
Source: http://www.longbeach.gov/lbrecycles/food-yard-waste/composting-at-home/composting-101/
Expanded Information 5:
Natural Gas Safety
Why does natural gas smell like rotten eggs?
Have you ever noticed that natural gas smells like rotten eggs? The rotten egg smell that you sense is actually added to the natural gas. Normally, natural gas is odorless and colorless; you can’t see it and you can’t smell it. The added smell is an odorant and it smells like rotten eggs!
If too much natural gas leaks, it can build up and eventually catch fire or cause an explosion. Scientists and utility companies add the rotten egg smell so you know when it is leaking. If you smell that rotten egg smell in your house, GET OUT right away. Don’t call anyone or turn on or off any lights or appliances. Any spark from an electrical appliance or smartphone could cause the natural gas to explode. The best thing to do is to GET OUT, then tell an adult or call the fire department. They can clear the area and make sure everyone is safe as the problem is dealt with.
Why does a candle burn yellow, but natural gas burn blue?
Natural gas is what is called a pure hydrocarbon. It is a gas made up mostly from carbon and hydrogen. Pure hydrocarbons burn blue. Pure may be a bit misleading as there are small amounts of nitrogen, oxygen and other chemicals in natural gas. Other examples of pure hydrocarbons are propane, methane and acetylene.
Burning blue usually only happens under perfect conditions. If any soot, dust or other pollutants are present, then the flame can be both yellow and blue. You see this in some stovetops or ranges when the stove or oven is dirty. The yellow flame of a candle is due to the burning of soot given off by the flame itself.
If you detect a natural gas leak, follow these steps:
- DO NOT light a match, start an engine, use a cellphone or turn on a switch
- Immediately and safely leave the area and warn others to stay away
- From a safe location, call 911 or the Energy Resources Department at (562) 570-2140
Expanded Information 6:
Natural Gas Conservation
Energy conservation is always an important issue. Not only can you save quite a bit of money on your monthly bill, you can do some other things as well. The Long Beach Energy Department has provided nine ways you can conserve energy in your home.
Keep Warm in Winter
For heating, set the thermostat at 68 degrees Fahrenheit during the day, 60 degrees Fahrenheit at night and turn it off when you are away or on vacation.
You may want to consider the purchase and installation of a clock thermostat for your furnace that turns the heat down automatically when you are away or asleep and brings the temperature back to a comfortable level before you return or get up.
For every degree you lower heating in the 60 to 70 degree range, you will save up to 3% on heating costs. Seniors and people with special heating needs should check with their doctors before changing normal home temperatures.
By installing insulation, a homeowner can cut up to 20% off a heating or cooling bill. The attic is one of the most important places to insulate. The insulation's R-value is the measure of how well insulation keeps warm air from escaping through it. The higher the number, the greater the insulating value.
Keep Attic Vents Open
Ventilation above the attic insulation lets moisture escape, preventing damage to insulation in the winter and keeping attics cooler in summer.

Stop Air Leaks
Gaps and holes where plumbing pipes and wires enter the home, and around exhaust fans and vents as they exit the home, should be caulked and stuffed with insulation.
Cut Air Drafts
If you can see daylight or feel a draft through a crack under or over a door, you may want to consider weather stripping.
Two Ways to Save on Heating Water
For every degree you lower the temperature on a 40-gallon gas water heater, you will save about 1.5 therms a year. If you have a dishwasher, set the temperature to 130-135 degrees. If you do not have a dishwasher, a setting of 120 degrees Fahrenheit is considered efficient and sanitary and will help prevent scalding injuries. A water heater insulation wrap keeps heat from being lost through the tank walls.
Use Windows to your Advantage During the Winter
Open draperies to let the sunshine in on bright days. Consider using insulated draperies and shades. Close draperies or pull down shades at night, or when temperatures drop.
Monitor Your Fireplace
Keep the damper closed unless you have a fire going. An open damper can let up to 8% of the home's heat escape out the chimney. Glass doors on the fireplace can help stop air leakage. If you use the fireplace to heat your home, investigate a blower to circulate the warm air.
Source: http://www.longbeach.gov/utilityservices/conservation-and-safety/conservation/gas-conservation/

